Bonus with drawback
Lemma: Game-defining items pair real upside with real cost. Players cannot quietly accumulate them; they must commit to a strategy direction.
What it solves
When upgrades are uncosted, every "great" run starts to feel the same: the player picks up everything, ends with the kitchen-sink build, and the last hour of the run is autopilot. Drawback-paired bonuses force commitment: taking the relic that doubles damage means giving up something concrete (HP, mobility, an entire system).
Result:
- Each run gets a direction. "This is the no-potions run." "This is the all-Strength run."
- Players reread their build mid-run because the costs are real.
- Different runs feel different; variety emerges from forced trades, not just from RNG.
The pattern is most powerful at boss-tier rewards: the rare, run-defining picks where commitment is the point.
Variants across games
| Game | The bonus | The drawback | Where it appears |
|---|---|---|---|
| Slay the Spire: boss relics | +1 energy / draw / damage / etc. | Lose potions, lose Rest, lose strikes, gain a curse | One of 3 picks after each act boss; usually game-defining |
| Slay the Spire: events | Powerful relic ("5 Apparition") | Real HP cost ("Lose 50% Max HP") | Event nodes throughout the run |
| Moonlighter 2: perk nodes | Ice damage scaling, Thunder damage scaling, etc. | Picking one closes off the other tracks for that run | Perk nodes on the dungeon DAG |
| Cult of the Lamb: sacrifice door | Opens a Crusade detour + a "Blood of the Covenant" bundled bonus track | Pay a named follower from the cult roster. Permanent, no resurrection. | Mid-run door node; the only place the dungeon directly extracts state from the hub |
| Cult of the Lamb: Fleece of the Glass Cannon | 2× Fervour, +curse damage | ½ HP, melee weaker | Persistent loadout slot; equipped at the Temple Crown before Crusade |
| Cult of the Lamb: weapon swap | Higher Damage stat on the new weapon | Lower Speed stat (or vice versa); cannot carry two | Mid-Crusade weapon-offer rooms; the pickup card shows the ▲ / ▼ deltas explicitly |
| Cult of the Lamb: Doctrine fork | One side of a cult-wide policy ("the dead are food" = Hunger relief) | Forecloses the other side forever ("Cremation" Faith bonus is now lost) | Each Doctrine slot unlocked by Bishop / mini-boss Stone drops; permanent at the cult-policy scale |
| Path of Exile: keystones | Game-warping rule changes (Chaos Inoculation = no chaos damage; Resolute Technique = always hit; Mind Over Matter = mana absorbs damage) | Equally game-warping cost (max life set to 1; cannot crit; mana becomes a defence pool) | Notable nodes on the passive tree; one passive point each |
| Mega Man Battle Network: NaviCust Bugs | Fit one more buff program into the grid by violating adjacency rules | Persistent debuff in combat (panel cracks, HP regen loss, button corruption) | Opt-in: place a program illegally to take the bug |
| Mega Man Battle Network: Beast Out | Temporary super-form: massive ATK / SPD / auto-counter (BN6) | When timer runs out → Bug Out / Beast Over = Tired emotion locks Full Synchro for 1+ turns | Per-battle, costs Emotion Counter |
| Hades: Pact of Punishment | Heat counter for clearing run = bonus reward (currency, gem caches, gift items) | Each Heat level adds a Condition that makes runs harder (enemies stronger, shop costs more, less healing, time-pressured bosses) | Hub menu, opt-in difficulty stack post-credits |
| Hades: Hammers of Daedalus | Weapon-altering upgrade (e.g. Sister Blades become a forward lunge) | Forecloses 1–2 alternative hammer paths for the run; sometimes nerfs another stat (slower swing, less range) | 1–2 chambers per run |
| Hollow Knight: Joni's Blessing | +40% maximum HP (replaces blue Lifeblood masks with permanent white ones) | Cannot heal with Soul. The entire Focus heal system is removed | Charm slot, late-game discovery |
| Hollow Knight: Overcharming | Cram extra charms past your notch budget | Take 2× damage from all sources until you remove charms | Opt-in toggle when equipping |
| Hollow Knight: Fragile charms | +HP / +Damage / +Geo bonuses for the duration | Shatter on death. Must pay 200/350/450 Geo at Leg Eater to repair each | Opt-in equip; the death-loop converts the charm to a Geo sink |
| Nier: Automata: OS Chip | The OS Chip is what makes the android function (it's the bonus of "being alive") | Removing it kills the character instantly and sends you back to your last save | Equippable in the chip menu like any other chip; the game does not block the unequip option |
| Nier: Automata: chip drop on death | All currently equipped chips remain equipped on respawn, including HUD elements | If you die again before recovering your corpse, the chips drop with the corpse are permanently lost | Standard death loop; the drawback is hidden until the player misses a recovery |
| Pokémon RSE: Natures | +10% to one of 5 stats (Attack / Defense / Sp.Atk / Sp.Def / Speed) | −10% to a different one of those 5 | Permanent on each Pokémon, set at capture or hatch; 25-nature grid (incl. 5 neutrals) |
| Pokémon RSE: Choice Band | +50% Attack while held | Locked into the first move you select until you switch out (or end battle) | Held item, equippable per Pokémon (1 item slot) |
| Pokémon RSE: status orbs | Toxic Orb badly poisons holder; Flame Orb burns. Burn would normally halve Attack and Toxic would chip away HP | But pairing with Guts / Quick Feet / Poison Heal / Magic Guard turns the self-status into a buff | Per-Pokémon, requires breeding the right Ability: niche but defining for specific builds |
| BotW: Heart vs Stamina trade | +1 Heart Container OR +1 Stamina Vessel at every Goddess Statue | The other one, permanently. You cannot fill both bars to max in a single playthrough. | 4 Spirit Orbs per trade × 30 trades total; the meta-progression fork that makes players become kinds of players |
| BotW: metal weapons in storms | High-tier metal weapons (Royal Halberd, Knight's Claymore) are top-of-line damage | In a thunderstorm, lightning targets metal: equipped or held metal calls a guaranteed strike | Chemistry-engine rule, applied universally; the player must drop the weapon mid-storm |
| Balatro: Spectral Cards (Ankh, Hex) | Strong run-warping upgrades: Ankh duplicates a Joker; Hex applies Polychrome to a Joker | Destroys all other Jokers | Once-per-run nuclear option; takes a fully-built Joker chain and discards 4 of 5 to amplify 1 |
| Balatro: Glass Cards | ×2 mult on score for that card | 25% chance the card breaks (permanently destroyed) per scoring | Per-card modifier; running multiple Glass Cards is a calculated attrition build |
| Balatro: Madness Joker | ×1.5 mult per Blind selected | Destroys 1 random other Joker per Blind | The most punishing per-Blind tradeoff; pairs only with Blueprint chains and 2-Joker minimum builds |
| Mina the Hollower: Uranium Bracelet | Deal significantly more damage | Receive significantly more damage (in a game where a few hits already kill) | A single trinket slot; the purest one-line glass-cannon switch on the site. Bet on your burrow timing. |
| Mina the Hollower: parry / Grave Counter | A clean parry unleashes a stronger counterattack | You must stay in the threat plane and time it to the incoming hit; mistime it and you eat the blow | The riskier of two defensive verbs (vs. the safe under-surface burrow); the bonus is only available to those who take the risk |
Visual reference
| Slay the Spire: Council of Ghosts event |
|---|
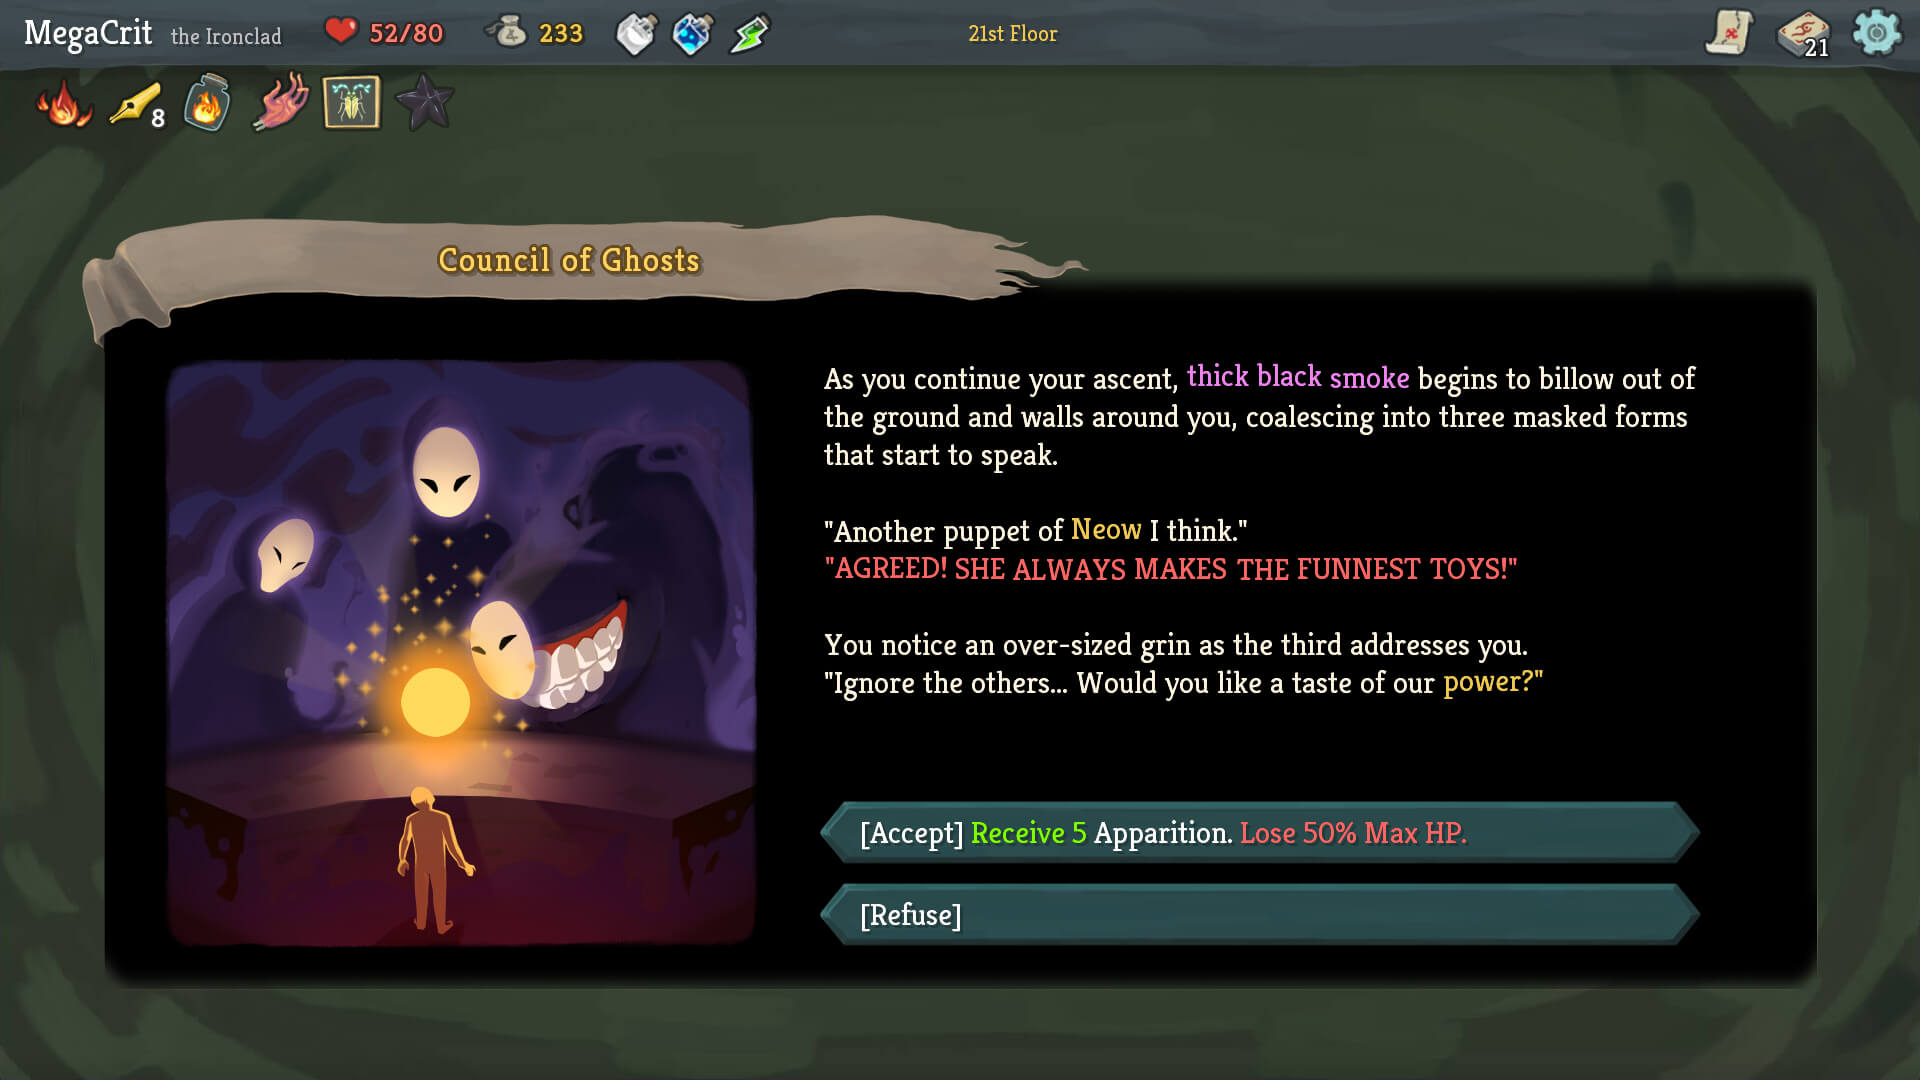 |
| The textbook example. Real upside. Real cost. Refuse is a valid third option. |
Two grades of drawback
- Soft drawback (Sparklite-style): "this patch is bigger so it costs more grid space." The drawback is opportunity cost, not a debuff.
- Hard drawback (Spire boss relics): "you literally cannot rest anymore." The drawback is a permanent ban on a system you rely on.
Hard drawbacks are scarier and more memorable. Use sparingly: too many and the player's run is more debuff than buff.
When to use this pattern
- Run-defining loot tiers: boss relics, ultimate items, story-progression rewards.
- Mid-run pivot points: events, choice nodes, faction-aligned rewards.
- Any time you want a player to commit rather than collect.
- Especially in roguelites: the run is bounded, so a hard drawback expires when the run ends.
Avoid when:
- The drawback would impact long-term meta-progression (frustrating, since the player can't recover).
- The game is short enough that drawbacks don't have time to bite.
- Drawbacks would require complex UI to track ("you can no longer use cards with X tag during boss fights").
Pitfalls
- Drawback is so harsh nobody picks the item: Spire's Calling Bell and Pandora's Box are sometimes accused of this.
- Drawback is cosmetic ("you lose 1 max HP"): defeats the point. The drawback should be felt every run.
- Drawback is non-obvious: players need to understand what they're losing before they pick. Spire shows the curse text plainly; obscure drawbacks feel like punishment.
- Drawback is system-incompatible with build: if the drawback locks out a system the player wasn't using, it's a free upgrade. Drawbacks need to bite at the current build, ideally.
Adjacent patterns
opportunity-cost-loadout: broader mechanism. Bonus-with-drawback is the explicit, costed version of opportunity cost.branching-dag-map: DAG maps often contain bonus-with-drawback choices (perk forks, elite-vs-shop tradeoffs).