Combat & weapons
The combat brief, in the developers' words:
"We wanted to create something with the scary, deliberate combat feel of old school Castlevanias, but in a top-down world similar to Zelda."
"Deliberate" is the load-bearing word. Attacks commit you: they have wind-up and recovery, you can't cancel freely, and Mina is fragile (a few hits kill on the default difficulty). That deliberation is what makes the game read as "2D Dark Souls": you don't mash, you spend an attack, and a mistimed swing is a death. It's also why the Hollowing dodge has to be so reliable. Punishing offense is only fair next to trustworthy defense.
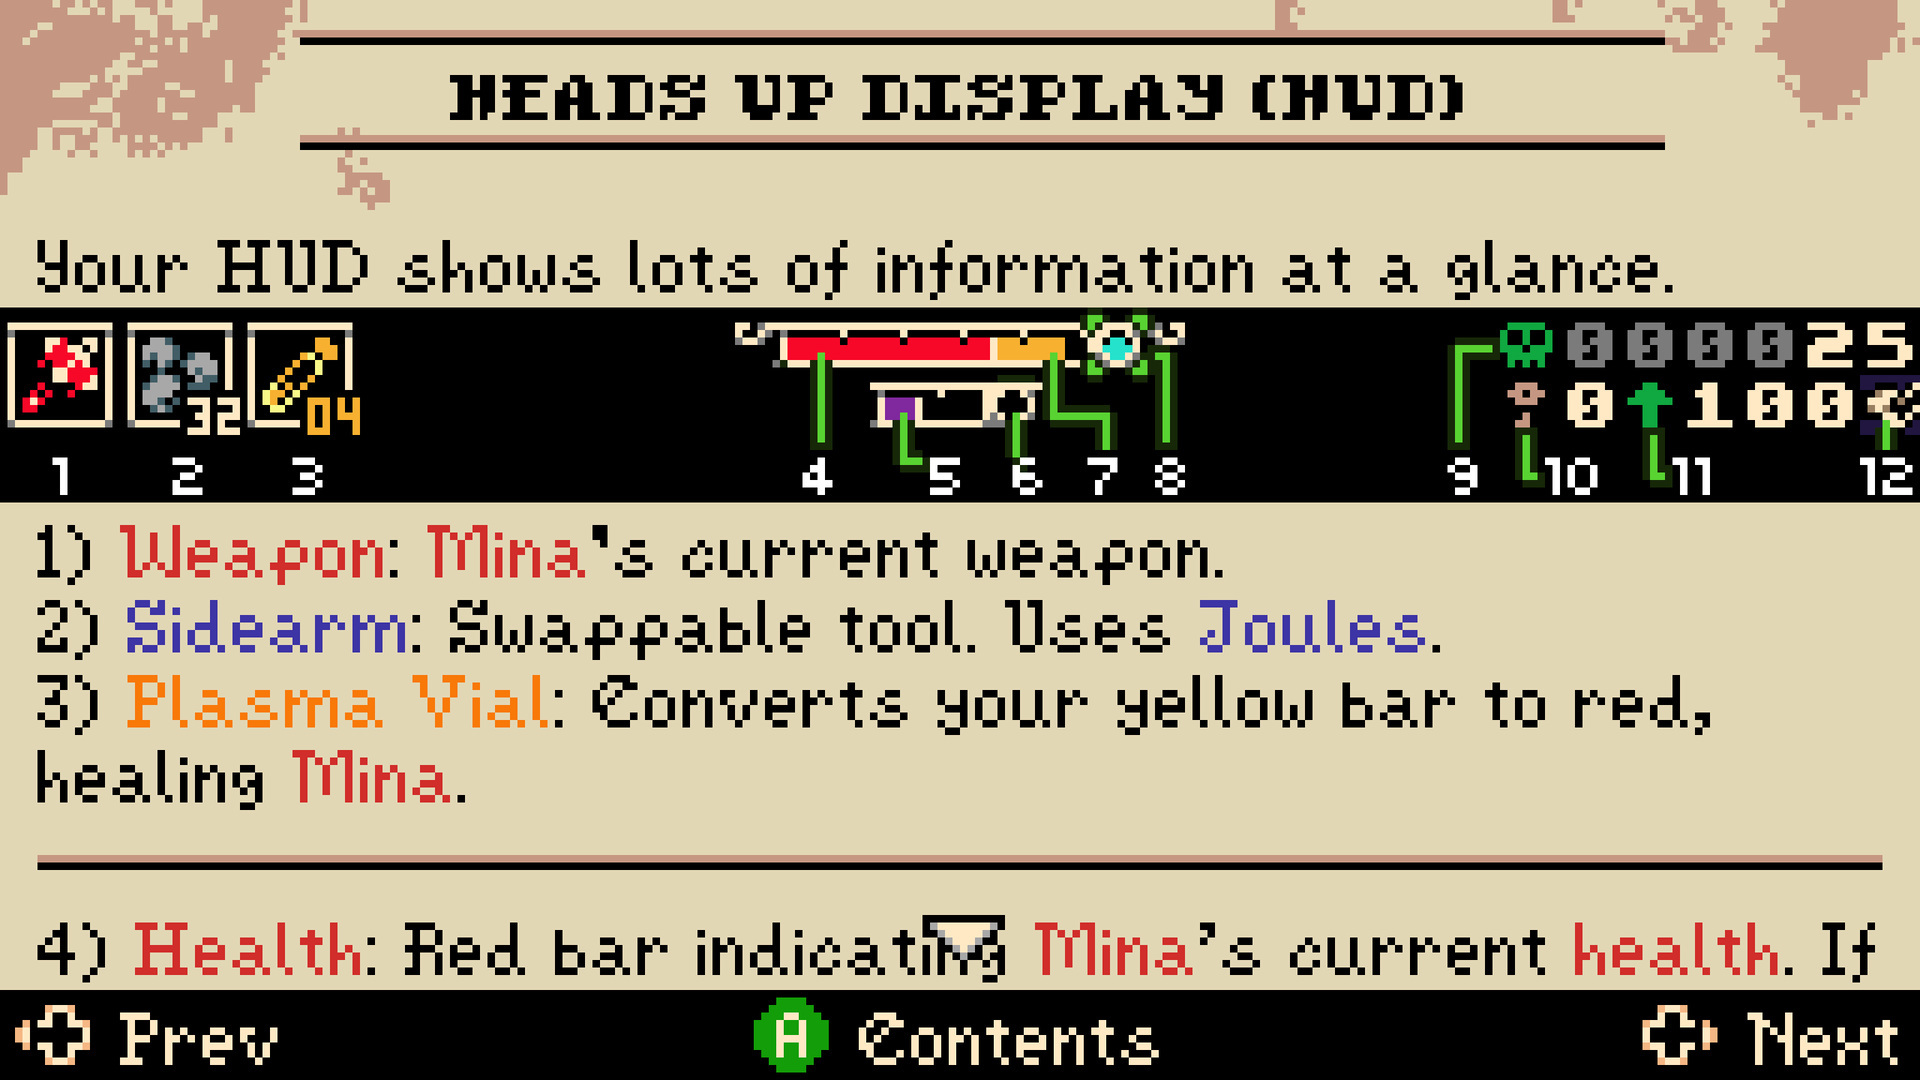 The combat HUD. The red bar is health; a portion of it is "yellow" (the Plasma Vial converts yellow to red), so healing is a banked resource you spend, not a passive regen. The small blue pips at the end of the bar are Sparks. Source: Game UI Database.
The weapons (5)
Three weapons are available from the start and two more unlock through progression. Each is a different commitment profile, not just a damage number:
| Weapon | Reach | Speed | Profile |
|---|---|---|---|
| Whip | Long | Slow | The Castlevania weapon: outrange the threat, but the long wind-up commits you hardest |
| Dual daggers | Short | Fast | Get in close, low per-hit damage, the most forgiving recovery; pairs naturally with burrow-in openers |
| Hammer | Medium | Very slow | Big single hits and stagger; the heaviest commitment, the biggest punish window if you whiff |
| (unlockable, e.g. Battery Buster) | varies | varies | Later-game options that re-shape the combat rhythm rather than just adding DPS |
The weapon choice is a playstyle choice, not a power-tier ladder: the whip and the daggers want completely different relationships with the burrow. The whip rewards spacing and patience; the daggers reward aggressive burrow-in, surface, three quick hits, burrow-out. Picking a weapon is the first axis of your build, and trinkets layer on top of whichever rhythm you chose.
Holding the attack button performs the weapon's alternate move (a charge or special), so each weapon is really two attacks sharing one button, another instance of the game's "small input set, deep recombination" philosophy.
The shield: bash, block, parry
A shield occupies its own equip slot and its own upgrade track. It's not a passive damage sponge; it's an active, timing-based verb:
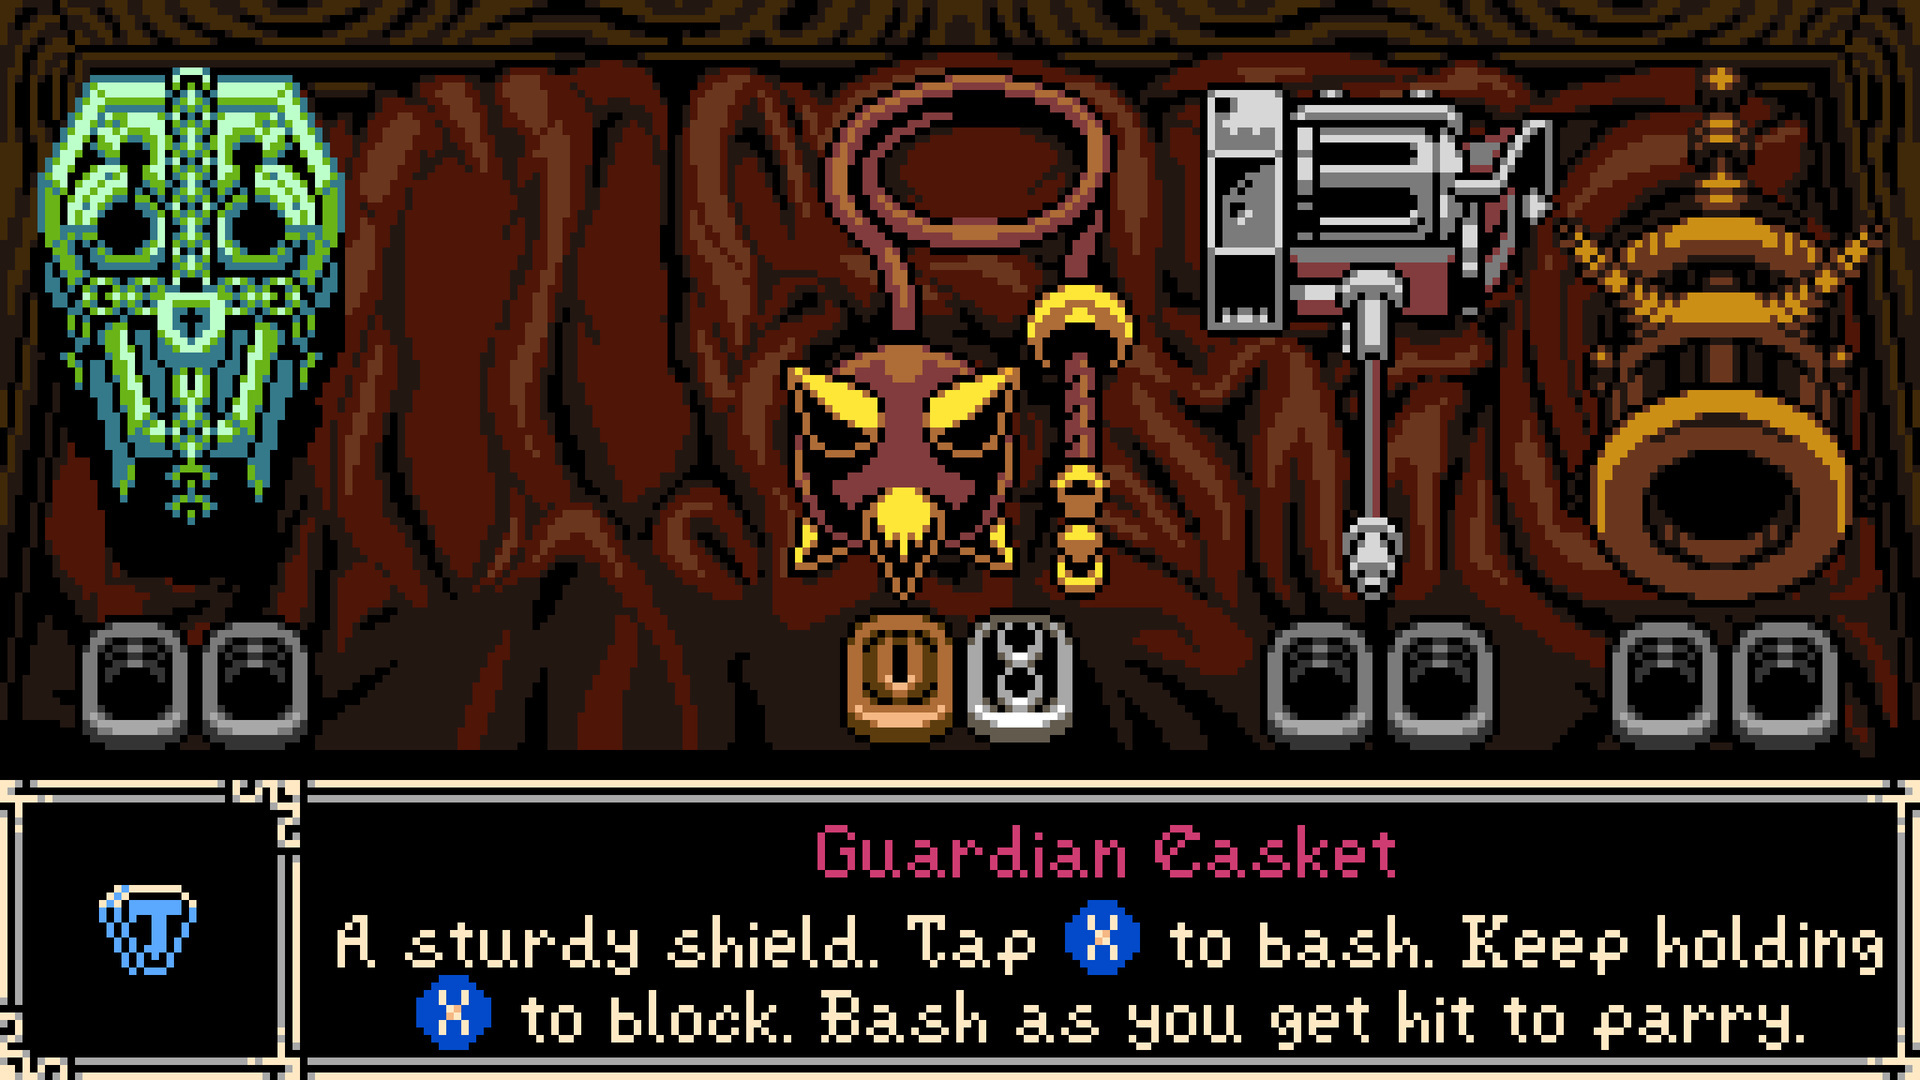 The Guardian Casket. One button covers three actions by timing: tap to bash (a quick shove/stagger), hold to block, and bash exactly as you're hit to parry. The parry is the high-skill, high-reward defensive option, the counterpart to the burrow's high-skill offensive option. Source: Game UI Database.
So Mina has two defensive answers with opposite shapes:
- Hollow: leave the threat plane entirely (safe, repositions you, no counter unless you've bought into burrow-attack tools).
- Parry: stay in the threat plane and meet the attack head-on (risky, but converts defense into offense).
Buying the parry upgrade makes that conversion explicit:
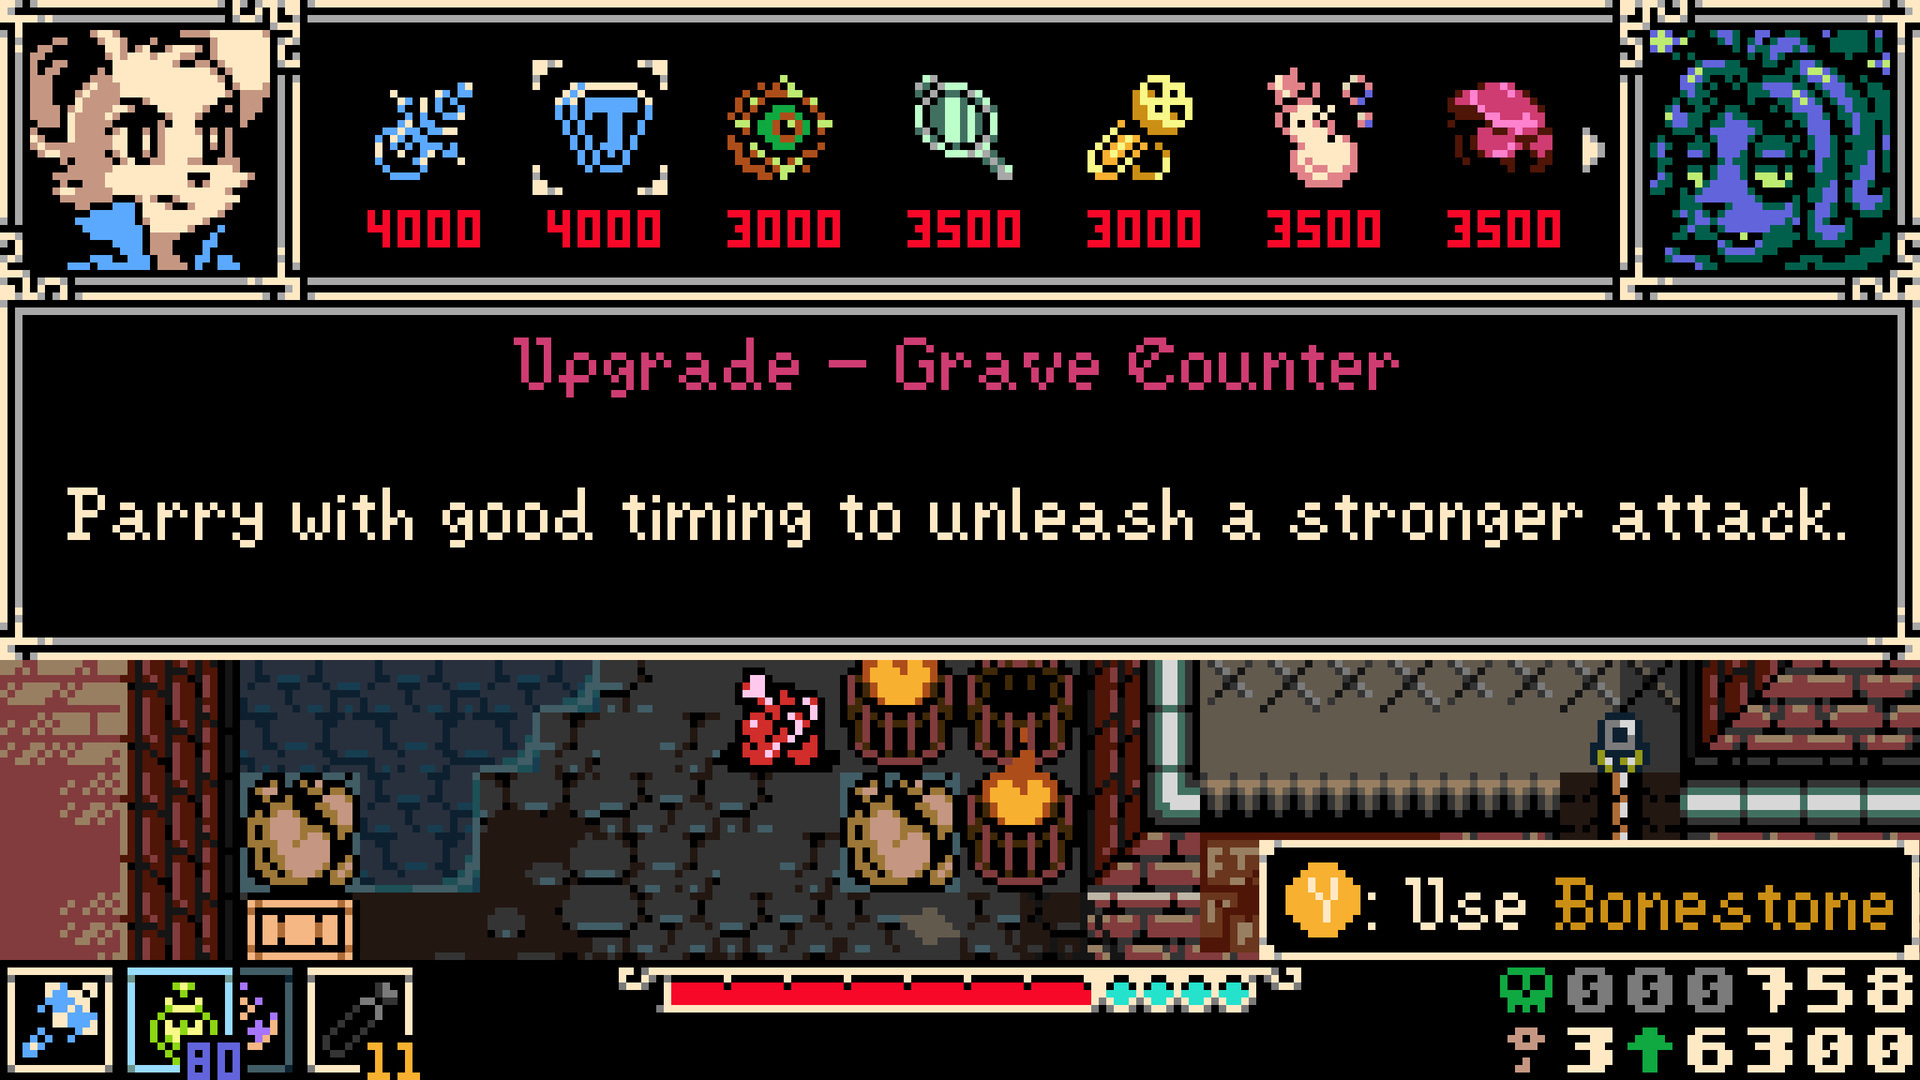 The Grave Counter upgrade: "parry with good timing to unleash a stronger attack." This rewards choosing the riskier defense: a clean parry isn't just damage avoided, it's a damage opener. Upgrades like this are bought with Bonestone at vendors; see progression. Source: Game UI Database.
The Plasma Vial (the heal)
Healing is a discrete, upgradeable resource, not regen. The Plasma Vial converts the "yellow" reserve on your health bar back to red, an Estus-flask analogue with charges. It has its own level track alongside Attack and Shield, so investing in survivability is a deliberate spend that competes with investing in damage. In a game where a few hits kill, how many heals you carry and how much each restores is a genuine build decision.
Where the trade-offs live
Mina's combat is full of bonus-with-drawback shapes, but most of them live one layer out, in the gear:
- Weapon identity is a soft trade: the whip's reach costs you recovery; the daggers' safety costs you per-hit damage. You can't have reach and speed.
- Trinkets carry the hard, explicit drawbacks: the Uranium Bracelet makes you "deal and receive significantly more damage," a glass-cannon switch you can flip.
- Sidearms trade burst power against a Joule economy and a death cost.
- The parry trades safety for an opener; the burrow trades the opener for safety.
The throughline: the combat system rarely hands you free power. It hands you a choice of risk, and your loadout decides which risks you're set up to take.
Patterns this exemplifies
bonus-with-drawback: weapon reach-vs-speed trades, the glass-cannon trinkets, and the parry's risk-for-opener exchange.- See also
opportunity-cost-loadoutat the trinket layer, where limited slots force the build to commit.